
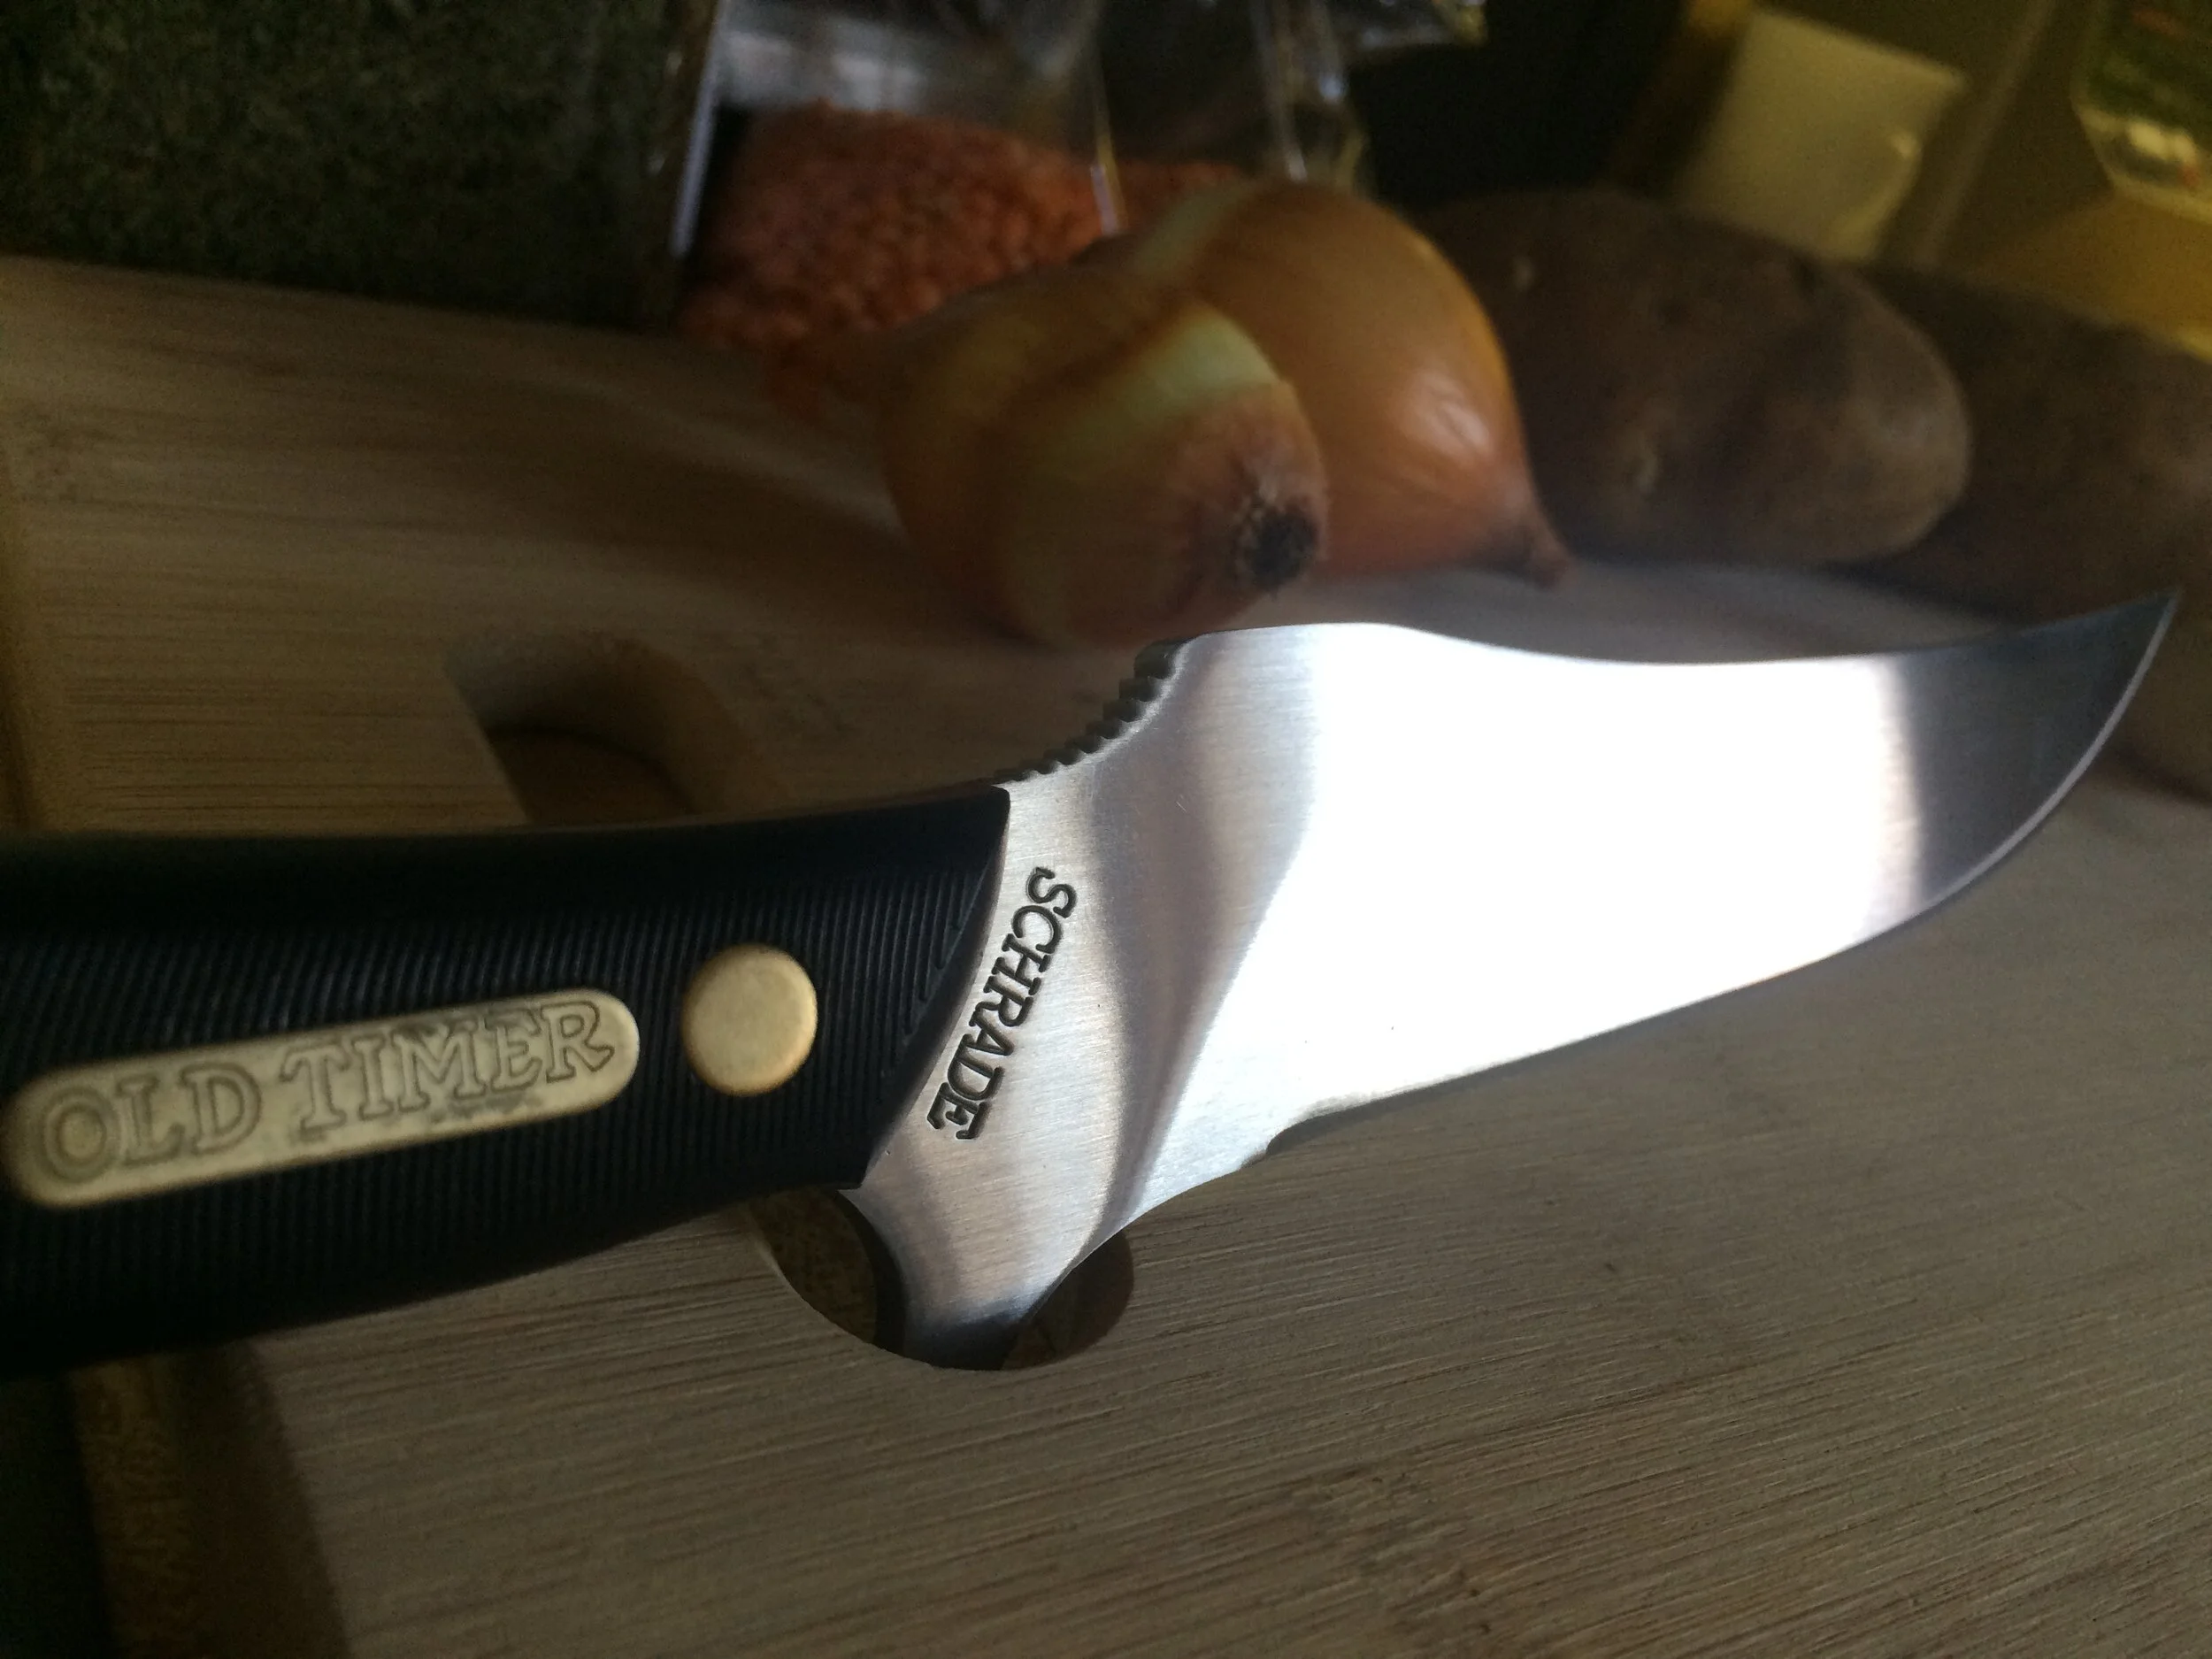
a review: schrade ot deerslayer and schf35 - @schradeknives #schradenation #legendary #oldtimer
We have been fortunate enough to have had Schrade (Taylor Brands LLC) as one of our sponsors during the 2015 season. The have been great to work with and have generously given us several tools to help us in our journeys. Two of which are the Schrade Old Timer Deerslayer 15OT and Schrade SCHF35. They have accompanied us on our adventures through Appalachia, and have been useful companions to say the least. I have used them on numerous occasions and feel that they are both solid tools that have many uses and that they would never fail me when I needed them.
FUNCTION AND DESIGN
As far as the function and design of these 2 knives they are both wonderful pieces of equipment to have on an expedition. I have used my Deerslayer for numerous tasks and it has done well in all areas. I love the shape of the blade and the feel of the handle, and it is one of the best looking knives I have seen…in my opinion of course. It comes with a very nice brown leather sheath and the pair of them go well together.
Now for the SCHF35, it is a really good looking knife as well and it is one that we decided as a team that we all wanted! It is a great size for carrying and is very sharp as well like the Deerslayer. It comes with a Kydex sheath that can be worn on the belt or mounted to your gear with its numerous mounting grommets. Both are stainless steel, so you won’t have to worry as much about the elements getting to them. Both are also full tang, meaning that the blade's steel runs the full length of the knife. I would trust either of these knives if my life depended up on them, literally….although I hope never to be in a situation where it does!
OVERLAND APPLICATIONS
The overland applications are numerous with these knives! I mainly used the Deerslayer to prepare the meals on our trips, due to its blade shape and length it functions nicely for this purpose. I will admit though that the blade is a bit thick, if you are planning on doing extensive chopping it would be of benefit to have a second chef’s knife to make things go a little quicker. It shines best when carving or cutting up meats though! We used the SCHF35 for tasks around camp, everything from cutting cordage to some meal prep. We even used it to do some slight modifications to our drone props when they were damaged after hitting some branches. There are so many uses I could never cover them all and keep this blog at a reasonable length.
DAY TO DAY
Day to day use is another area that these blades are handy. I carry one or the other in my truck with me at all times, you never know when you will need a good knife. I guarantee when you need it and its not there you will be sorry! The Deerslayer is a good bit larger and would not be as easily tucked away in the vehicle. I feel that the SCHF35 would be a better every day carry knife for this reason. In a hunting situation the Deerslayer would be my knife of choice, the name kind of gives that away. Either way, you can’t go wrong with either of these knives!
FINAL THOUGHTS
My final thoughts are that both knives are quality tools that would serve anybody well in numerous situations. Do a little homework before purchasing any knife and ask yourself what will be its main use, how often will you us it and what do you want to spend. Once you have done this if you chose a Schrade knife I can almost guarantee that you won’t be disappointed. I have numerous Schrade tools, some have been given to me and other’s I have purchased. I am always impressed with the quality of the blade verses the price that I have spent. Meaning that for the price it’s hard to beat their quality, period!
For more info you can visit: Old Timer Deer Slayer and SCHF35
a review: goose gear adventure box @goosegearca #overland #adventure #storage
Dogs love Goose Gear.
THE BUILDER
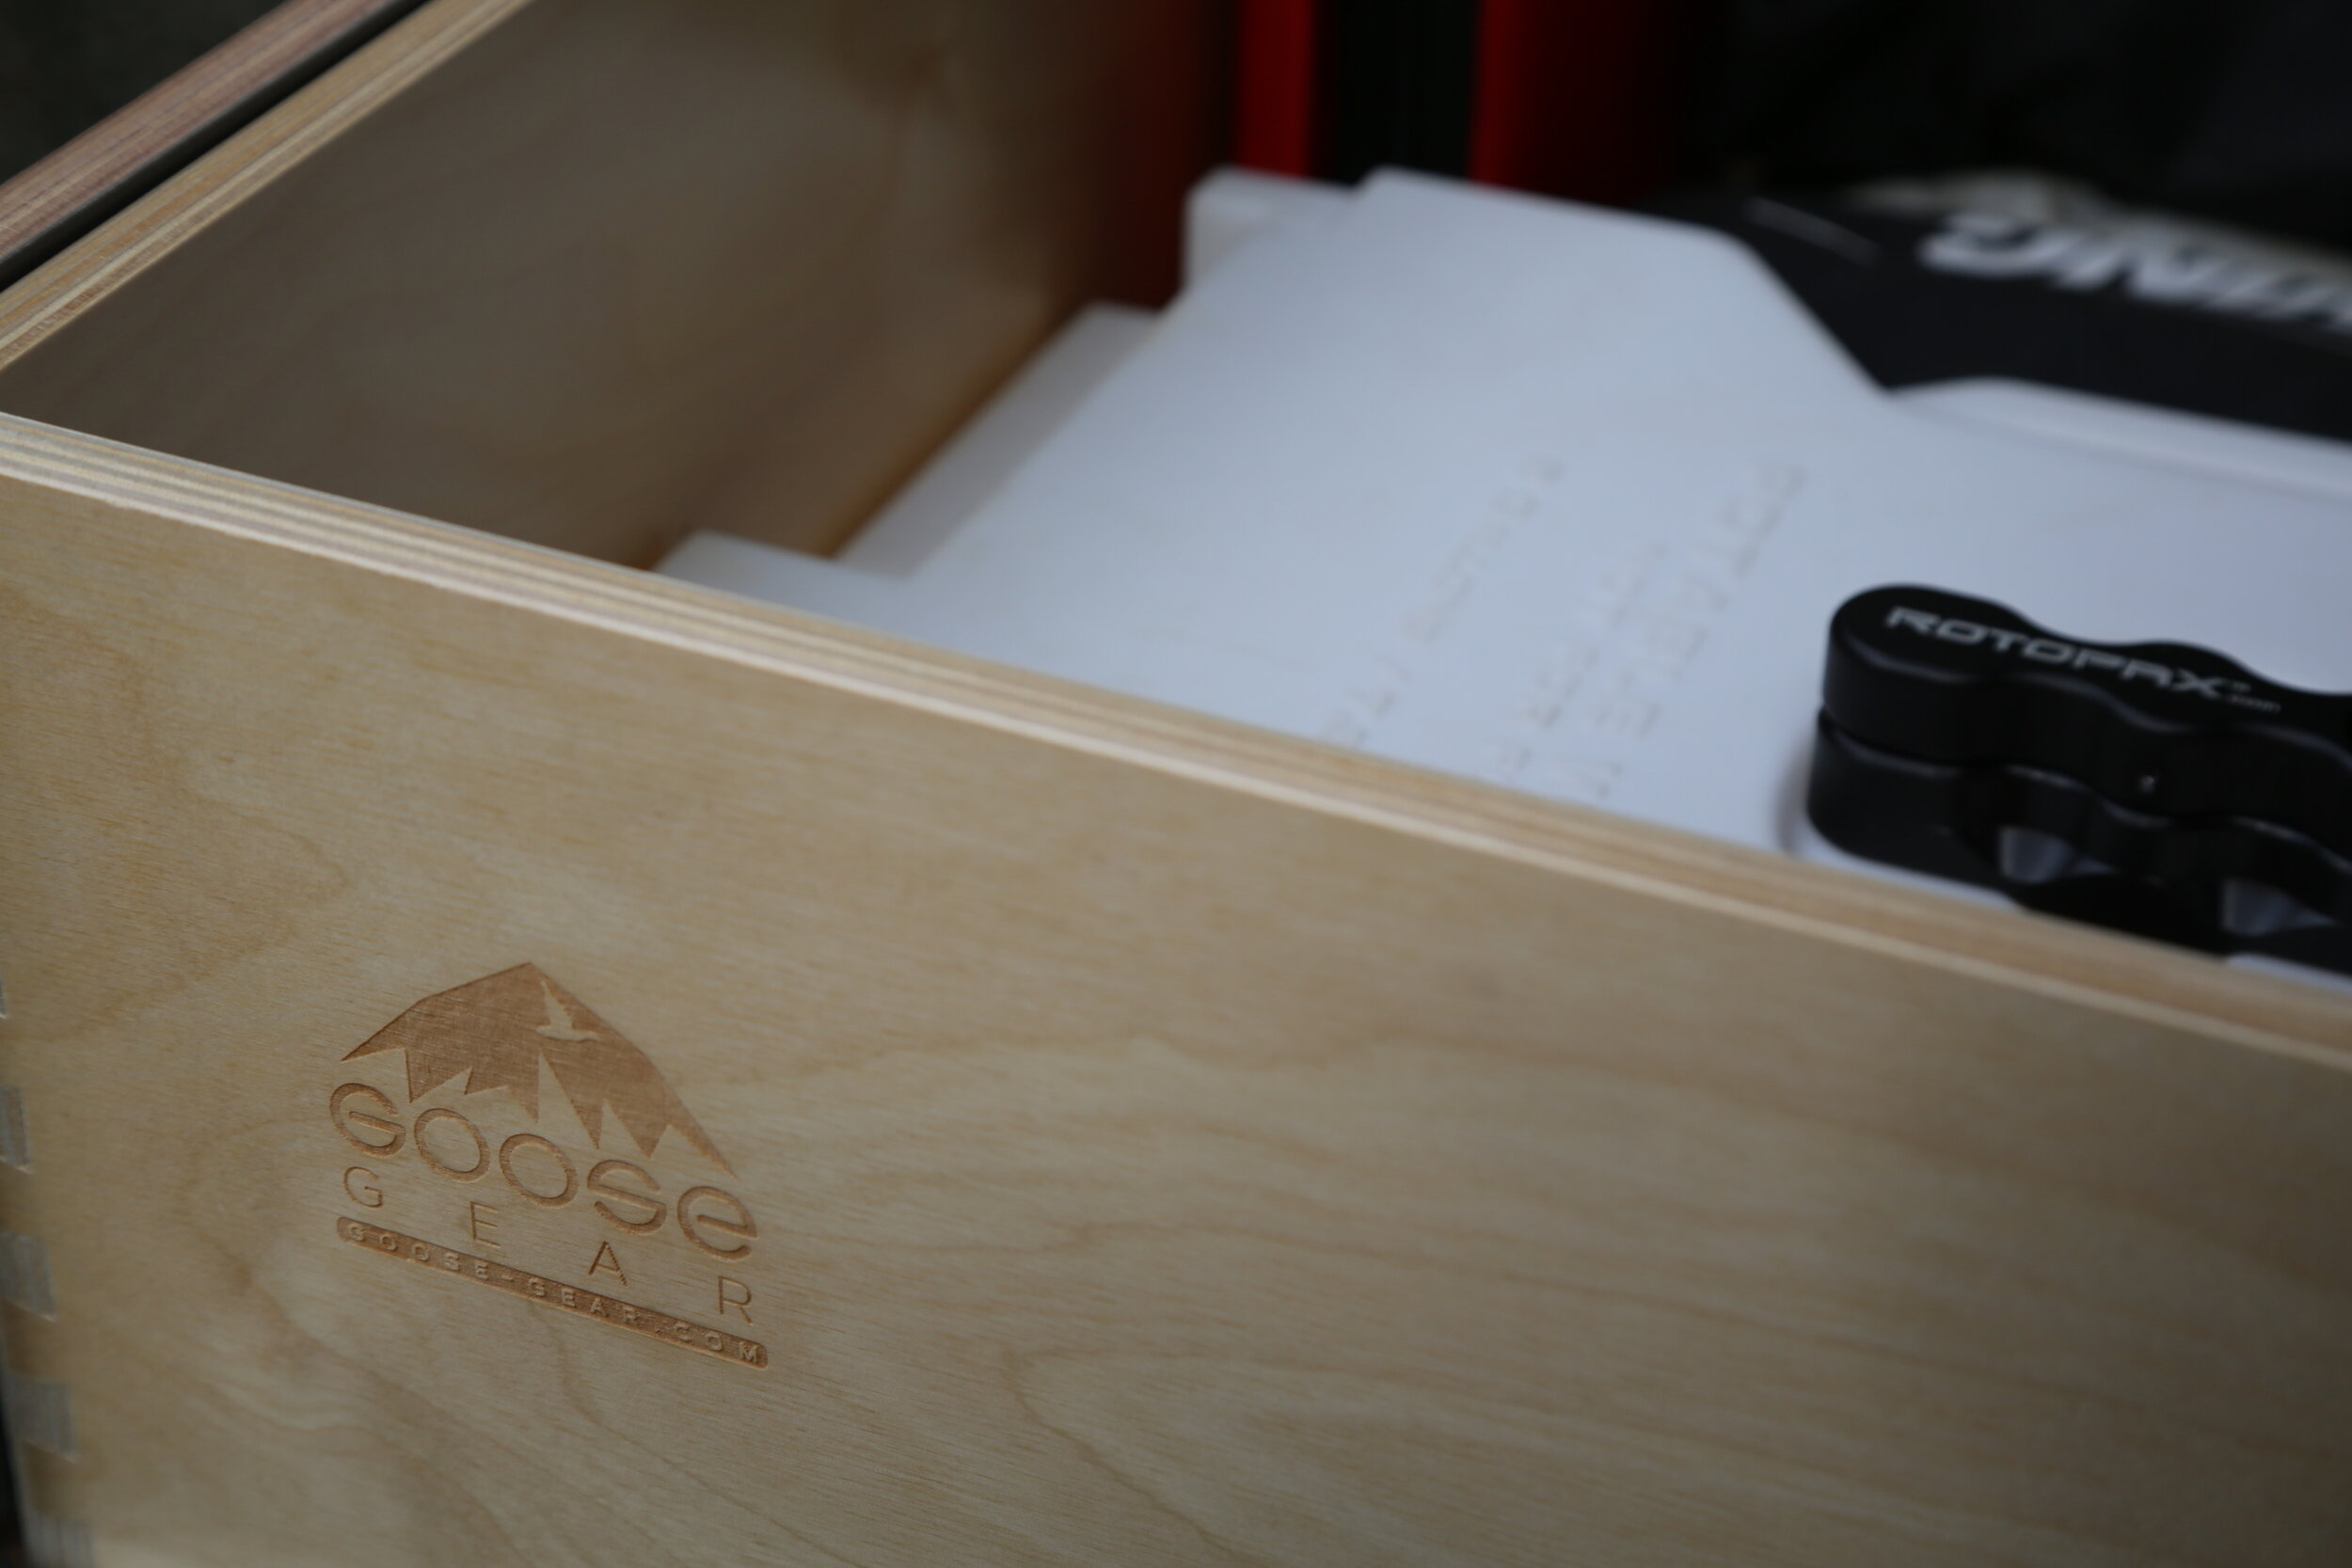
If you haven't heard of Goose Gear, maybe you've at least seen images of their tidy setups on Instagram or Facebook. At first glance the "sticker shock" might send you back to your garage with a circular saw and a few sheets of plywood but take a closer look at the product and you'll see attention to detail that can't be surpassed.
An added compression latch keeps the drawers shut tight and eliminate weight shifting when negotiating rough terrain.
Paired with quality craftsmanship and top notch customer service, Goose Gear's corporate DNA dates back to 1952 and their years of experience crafting cabinetry translates into product that's both aesthetically pleasing and extremely reliable. Whether you're in the hunt for custom work or searching out individual boxes to outfit your rig, Goose Gear has you covered.
THE NEED
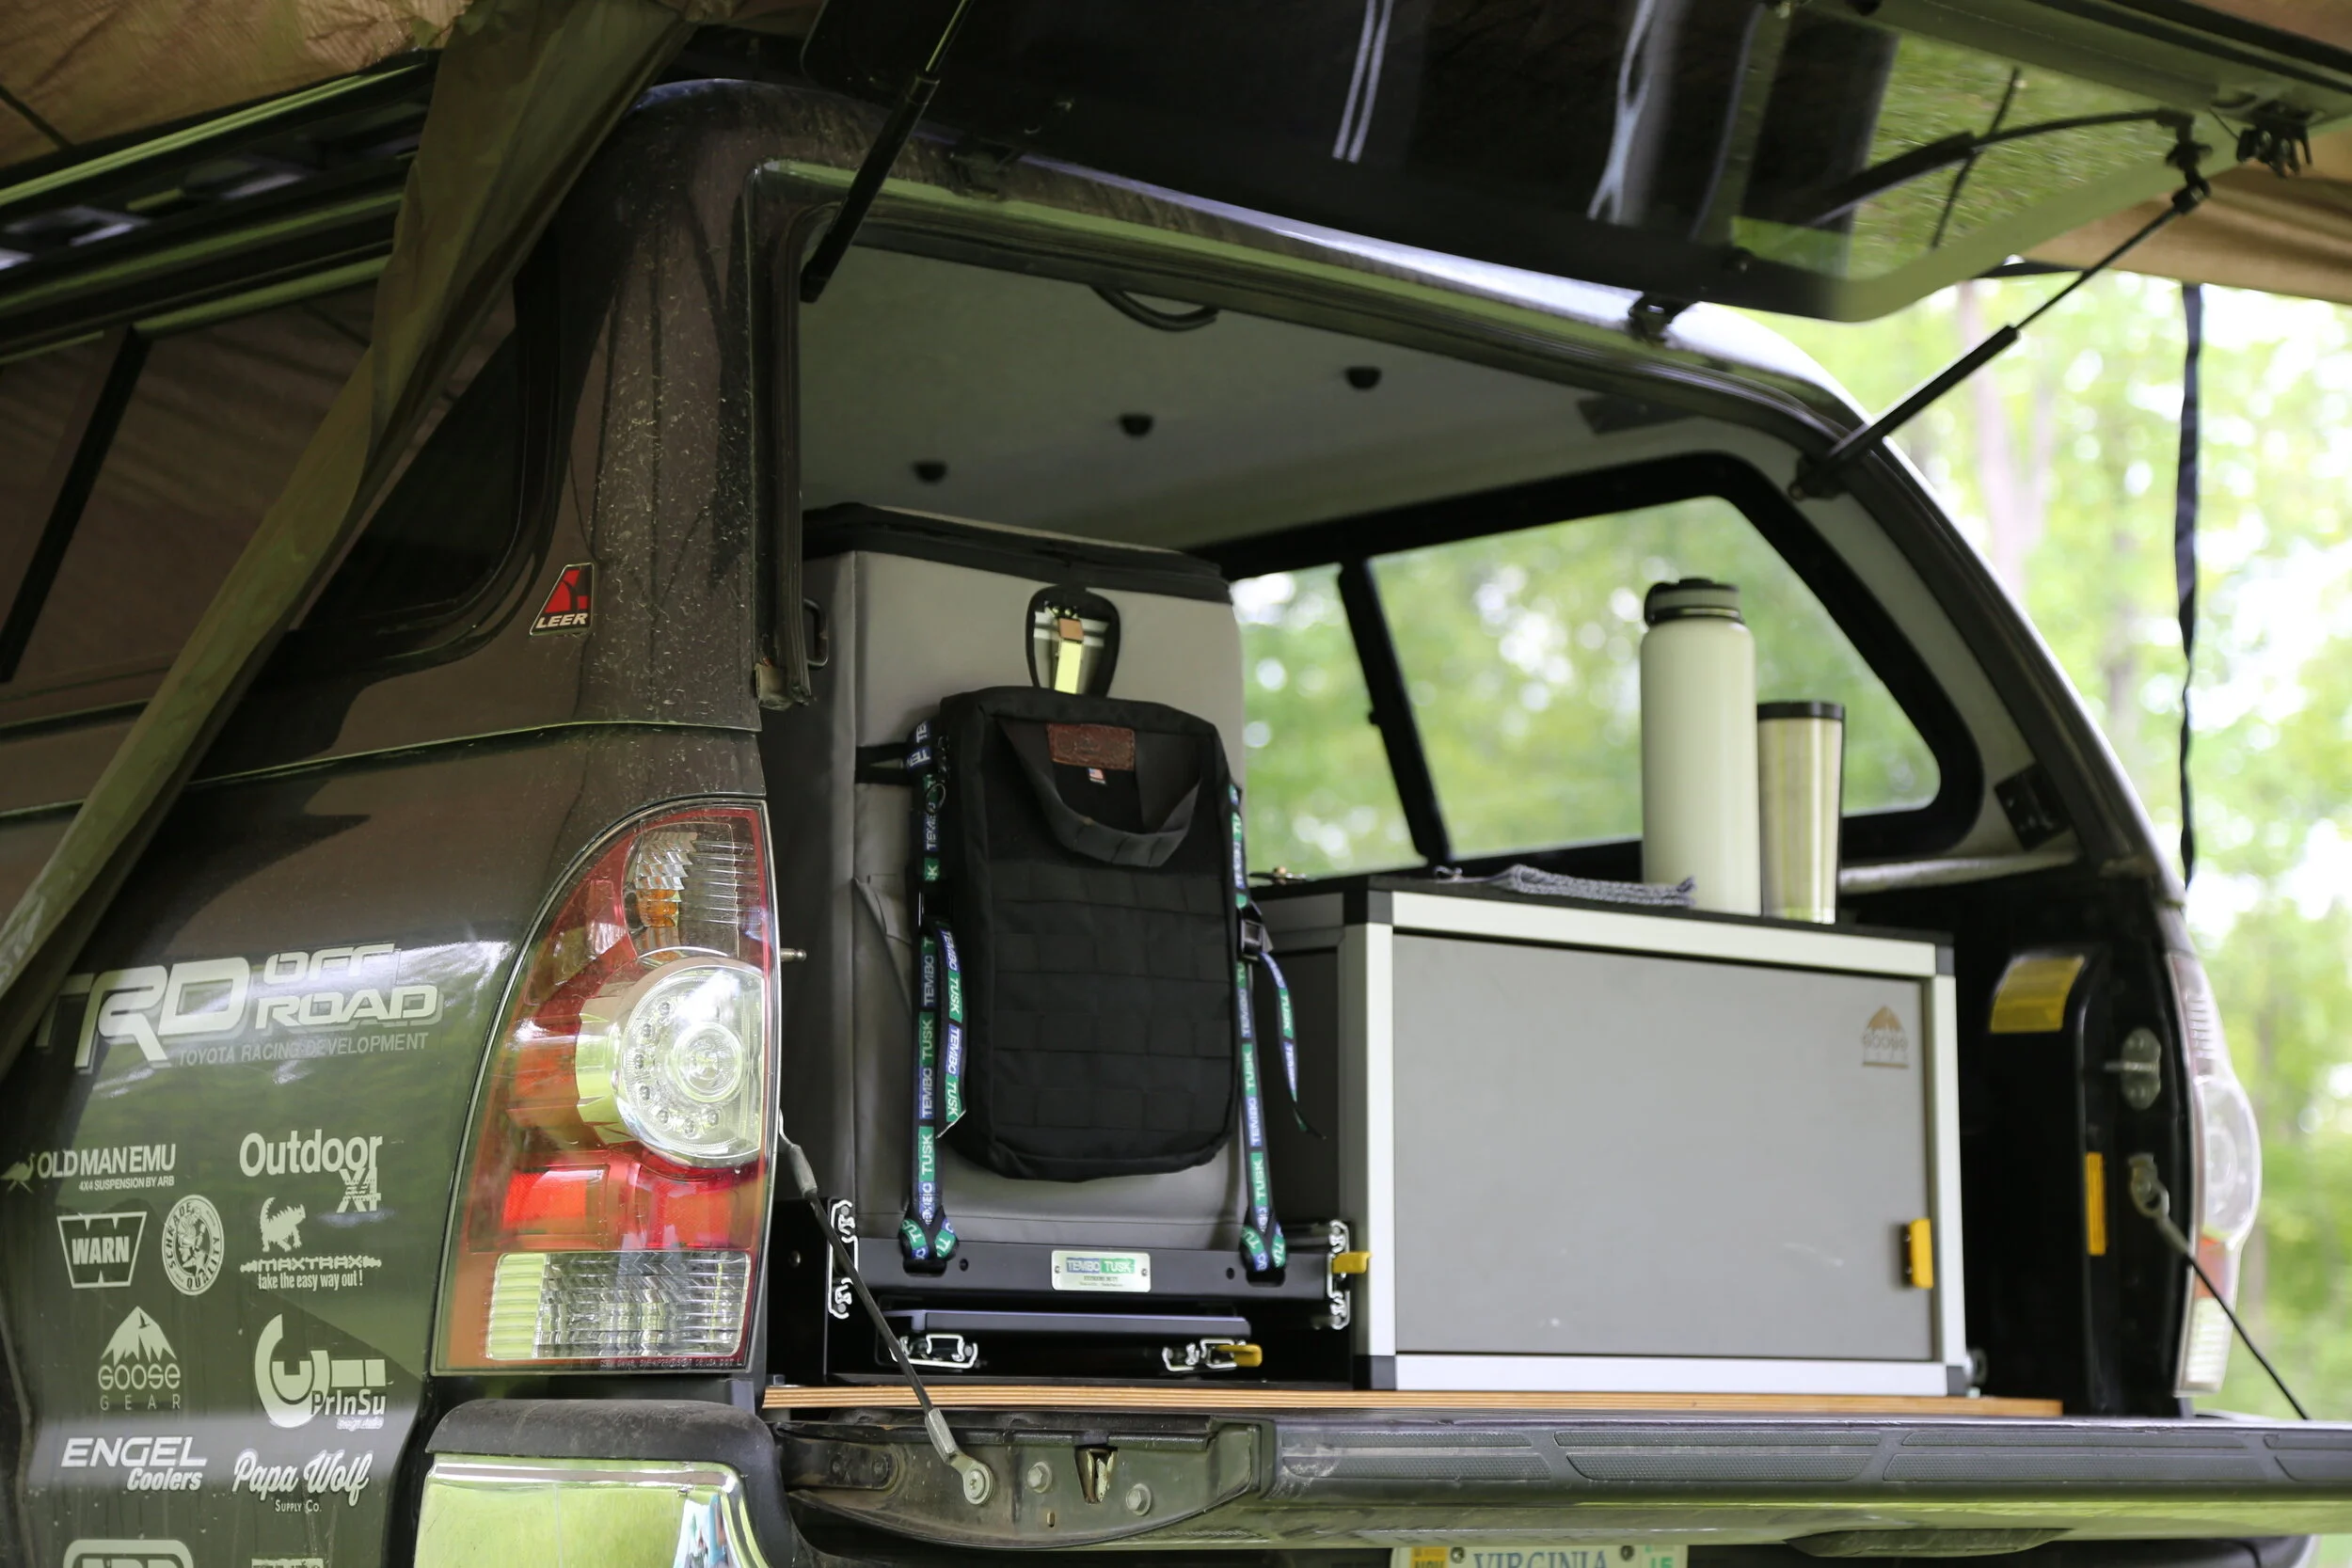
Toward the end of 2014 I started rethinking storage in the bed of the Tacoma. My dad and I had previously built a full pull-out drawer system that functioned perfectly but it was time to redesign a storage solution that would accommodate a fridge/freezer and slide.
The new design started on paper with multiple trips to the back of the truck to remeasure. The new storage units would include one large drawer on the passenger side that was the length of the bed plus a smaller storage unit tucked up against the cab on the driver's side.
Thinking through the work involved with building a new setup left me searching for someone to build a custom solution that had experience enough to craft a rigid platform for our adventures in the Appalachian Mountains.
THE INSTALL
Based on your particular build, you can be looking at just a few weeks before your modules ship and this left me just enough time to hunt down some birch plywood and cut a base plate to fit in the back of the Tacoma. The base plate covers the entire floor of the bed. It's anchored to two factory tapped holes near the tailgate and I marked and drilled two additional holes near the cab.
The next step was removing the drawer from the long box and laying out a drill pattern for each unit. I used T nuts and button cap bolts to fix the units to the base plate before lifting the entire setup into the back of the truck. The four base plate bolts were set before I started reinstalling the drawer.
Overall, the install took one evening. I've since perfected the process having removed the units at least twice for hauling purposes. The majority of time spent during the install was measuring and remeasuring before I drilled new holes in the back of my truck [insert tears].
THE USEFULNESS
For almost 1 year I've hauled Goose Gear in the back of the Tacoma and I couldn't be more pleased. These Adventure Boxes have seen mud, rain, dirt, dust, dogs, loads of heavy gear and miles of rough roads, washboards and still keep my crap in check.
Each unit serves its own distinct purpose. The small box behind the driver is reserved for less frequently used items. Specific to MSO, I store my jumper cables, tools, winch remote, recovery gear and other items that can typically weight until the next campsite or trail. To access the equipment I either climb in the back of the truck or reach through the side window of the cap and left open the lid to grab my gear. The lid rests on a piano type hinge and latches when closed.
Hardware is easily accessible on the outside of this Goose Gear box making disassembly straightforward.
In the large drawer I keep everything else - clothes, food, awning and tent accessories, headlamps and camera equipment. This is my "essential container." The items in the drawer are typically things I need in a moments notice.
On top of the drawer and smaller box, I installed L track from my local Northern Tool store and cut a truck bed mat to sit on top. The L track gives me options for anchoring down coolers, Pelican Cases and other itemsI can't store on the roof. The rubber mat assists in transporting my 3 pups so they have a comfortable and secure place to sleep and stand.
Reliability and design standards that gives any truck bed a new purpose.
THE CONCLUSION
Look around and you'll find a lot of great products designed to fit a wide range of vehicles, but Goose Gear is your only professional, custom vehicle storage builder. Sure, all the "do-it-yourselfers" will likely have another plan in mind but few can build a product as clean and as well constructed as Goose Gear does.
The drawer unit that was built for the back of the Tacoma was one of the largest modules Goose Gear had ever built. They informed us prior to the build that we may have to revisit installing a latching mechanism to keep the drawer closed tight when loaded heavy but I chose to give it a test run on our first trip of the season. Sure enough - after traveling miles of rugged terrain in southern WV during late May, we blew out the tiny tab on the heavy-duty slides that kept the drawer shut.
Within the first week after arriving home, Goose Gear had shipped me a new set of slides, a compression latch and specs for a cutout. The adjustable compression latches ensures that the drawer is closed tight and eliminates weight shifting completely. Once the new slides and latch were installed I made my adjustments and haven't had a lick of problems since.
The biggest advantage aside from the form and function of Goose Gear boxes is the creative minds that build each unit. The consultation process prior to the build offered loads of insight and resulted in some design modifications that would have otherwise been overlooked during a personal shop project. Whether you're looking for someone to build your box or seeking some fresh ideas Goose Gear is out to serve adventure travelers abroad.
trip report: gettin' somewhere - #tennessee #northcarolina #gettindeeper #appalachia
Trip Report: Gettin’ Somewhere
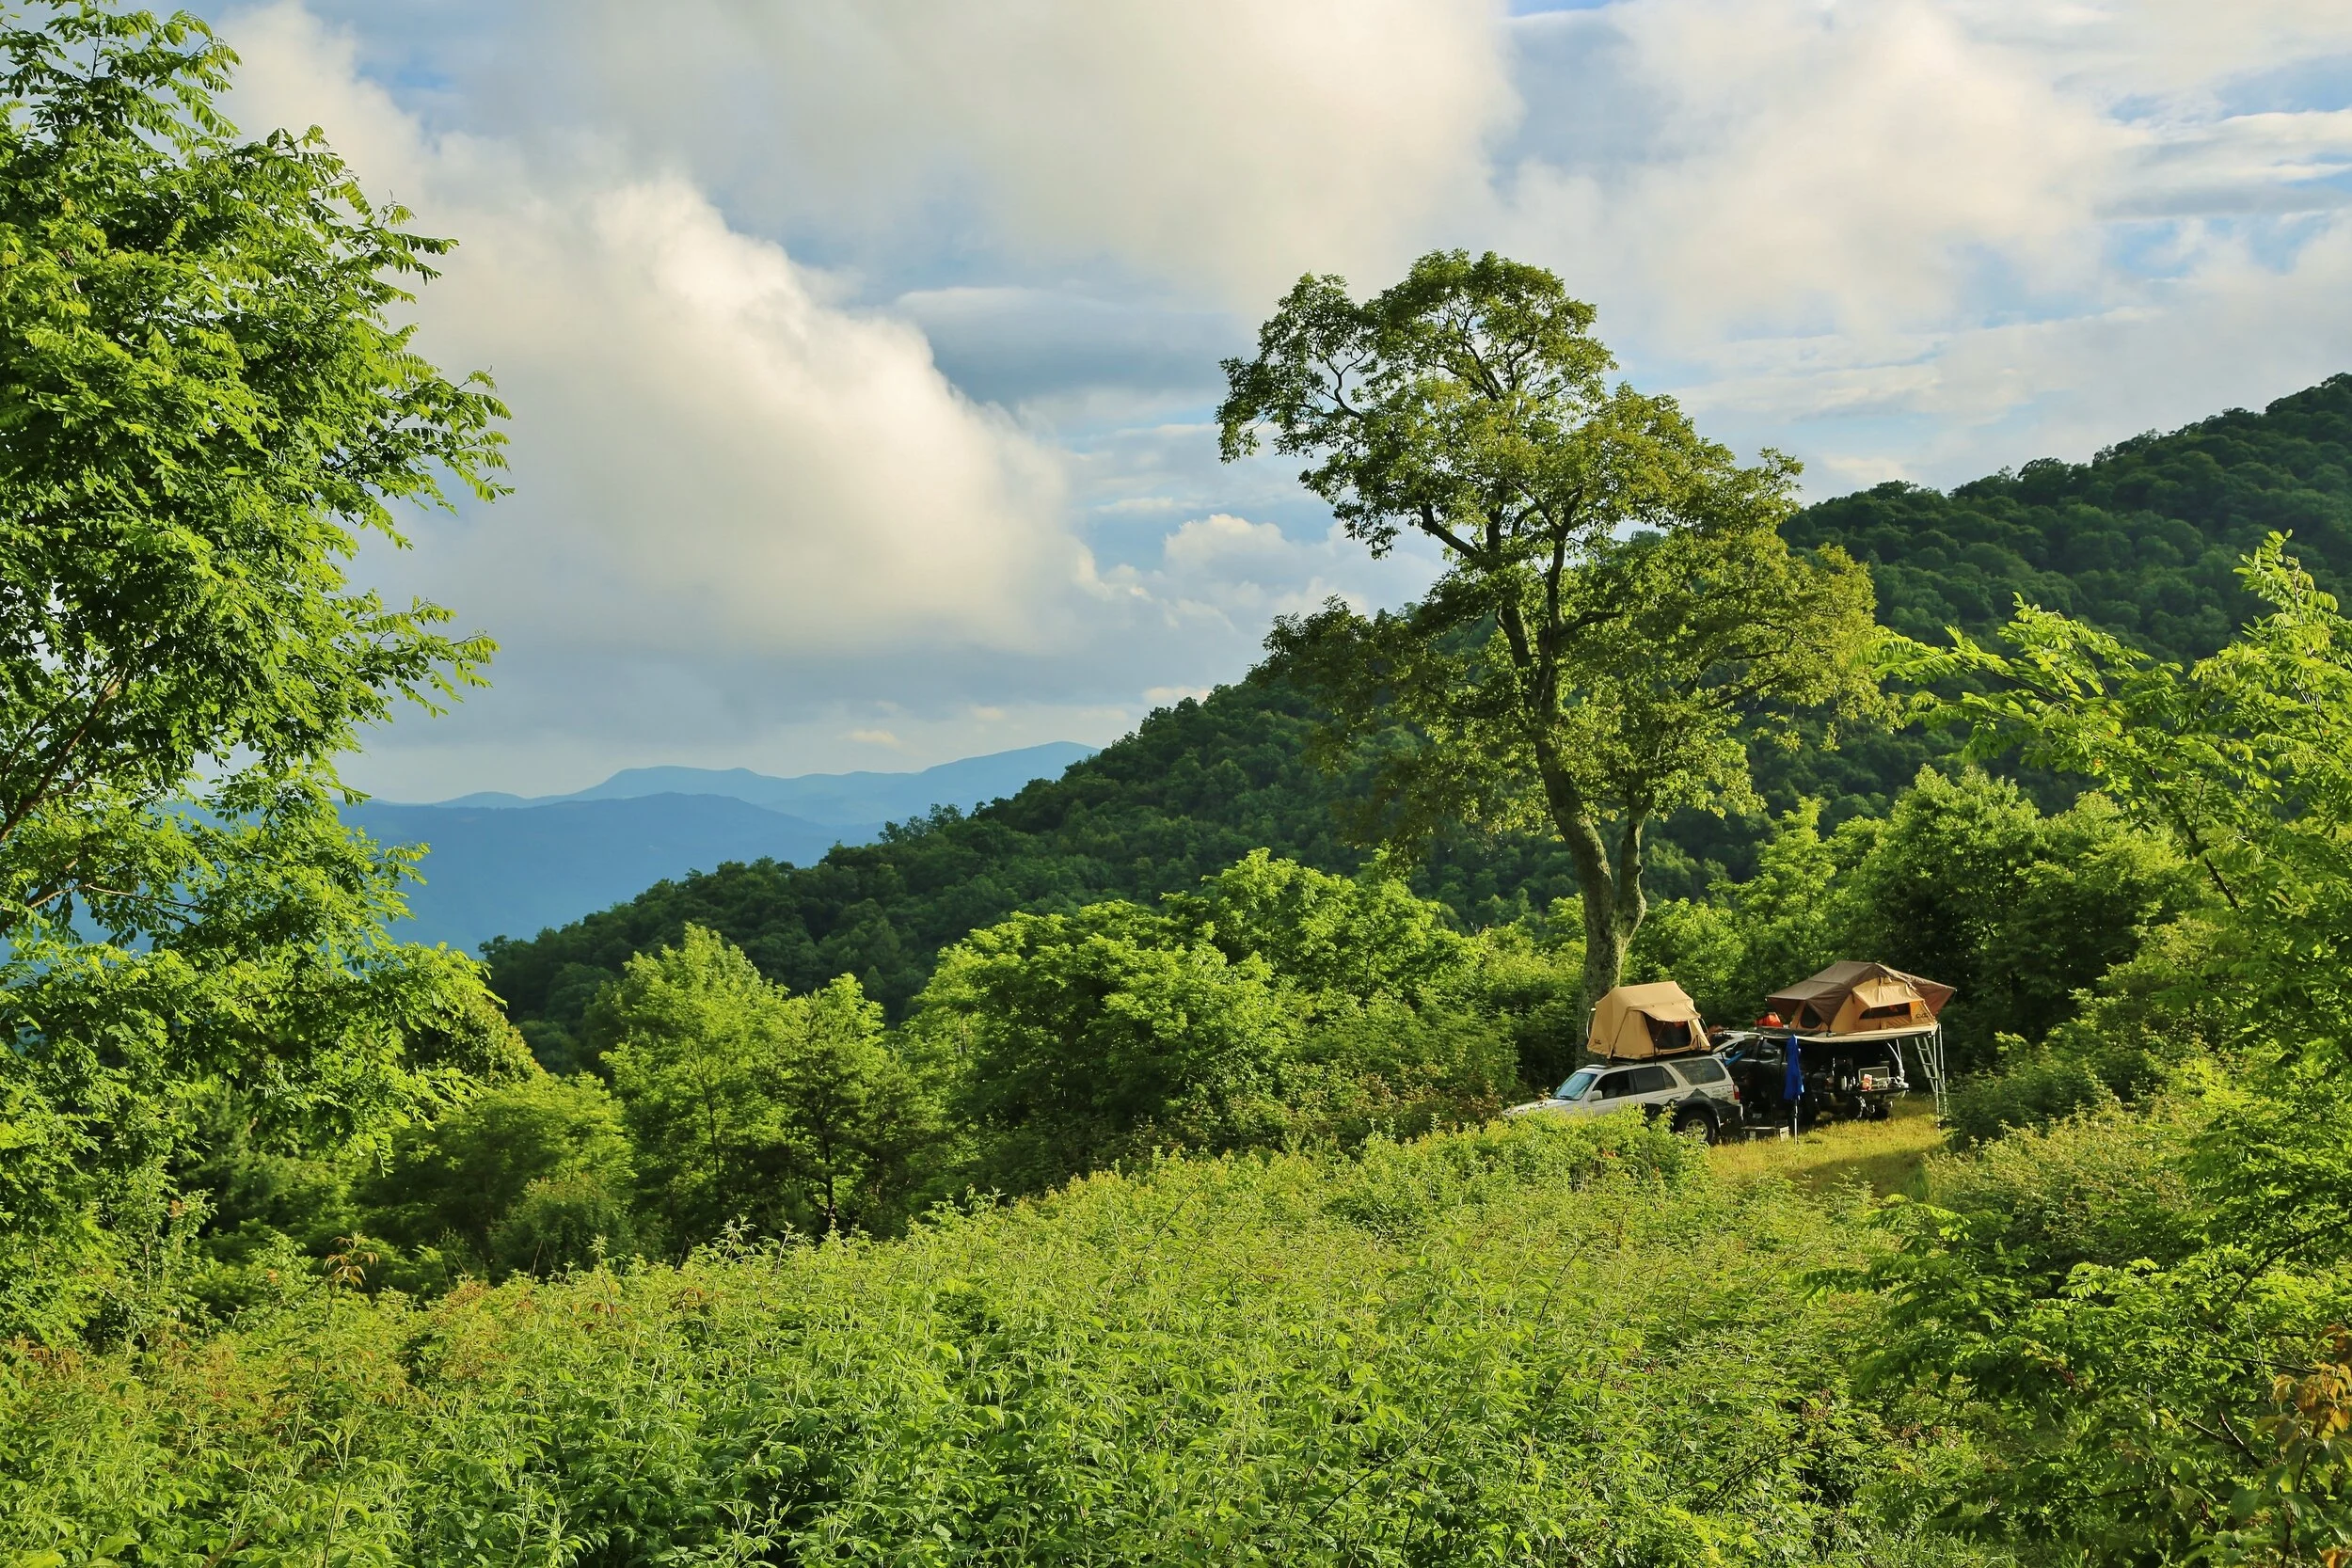
This trip was to be one that took us deeper into Tennessee and the heart of North Carolina and it was looking like it was just the 4 core members of MSO. We had hopes of a plus one to take along in the way of a writer for Roads and Kingdoms Online Magazine but he couldn’t join us on the trip due to last minute responsibilities. Like all plans in life they sometimes don’t work out the way you want….but in the end are still pretty awesome anyway! We had slated to start out somewhere near Erwin TN and then end up somewhere near Asheville or Brevard NC. We also planned on trying to go to a few truly unique locations in NC, sort of a hunt for folklore and interesting places if you will.
Gist of the trip:
When we started planning this trip we wanted to seek out some unique locations, maybe a legend or 2 and a little folklore and then put it all into a couple killer videos. We also wanted to get in some epic off-road driving adventure too of course. We hoped to really take the filming and video aspect of this trip up a notch as Gaby was bringing along his new drone to help take it to another level. As we headed out to meet up with the other guys in Wytheville VA the familiar sound of the pavement under our tires was playing our song, its almost a soothing sound to us because we know that it meant another trip was underway. We met at the first coffee house we could find and loaded up on java and grub, then headed toward Tennessee! Unfortunately before meeting up we saw some of the havoc that the heavy rains were causing in the way of harrowing accidents on the roadways, one was actually flipped over on its roof. Thankfully it appeared that nobody was injured and we were able to keep moving, so with our spirits high and minds focused on the trip ahead of us we wondered what grand obstacles we would face, and thus we headed toward our destination with adventure in mind!
Highlights:
One of the big highlights was definitely having the whole team back together for this trip, Gaby wasn’t able to go on the first trip and season opener, 4 States 4 Days. His camera work and drone piloting will definitely make the upcoming videos something to behold. We affectionately have dubbed him Maverick…you know from Top Gun. Another highlight was at Pounding Mill Overlook, it was awesome and the drone flying around really drew a crowd as people passed by, they couldn’t help but stop and watch. Yet another highlight was getting to go to the Brown Mountain ORV Park, they have designated “Jeep Trails” there for the larger vehicles to use. Those of you that are wondering, yes you can run Toyotas on “jeep trails”, although I’m pretty sure that several of the other trail users would have preferred not to have had to deal with us being in their way. In their defense though it is slightly more of a playground for 4 wheelers, motor bikes and the like. We spent the night near the trails that evening and jokingly talked about the Brown Mountain Lights, hoping to see something but secretly glad we didn’t! Hammock were the big hit and are a must on a trip, I think we are all going to be sporting them from here on out I’d bet! There are more highlights but I don’t have room to list them all, you’ll just have to watch the videos to get more.
What we learned:
That you don’t want to fly your drone between trucks and into the wild blue youder…off side of the Pounding Mill Overlook….if there are tree limbs in the way. Ha, poor Gaby had to traverse a hundred feet of practically vertical terrain in order to retrieve the drone. Although to his credit he did it with determination and resolve and only had a few scrapes and bruises to show for it. That hammocks are our friends at the end of a hard day on the trail! There are so many great recipes that you can make on a Tembo Tusk Skottle. I am still amazed at its versatility and pretty much am starting to believe that it will be the main cooking tool on trips. Look for another BackCounty Cooking episode to see it in action! We learned that Judaculla Rock is both a unique soap stone boulder found in the middle of a field, and that there are hieroglyphics on it that you can’t find anywhere else in the world!
Final thoughts:
In planning for these types of trips it’s good to be flexible and to really try and keep the true meaning of what you are doing in mind. In our case we wanted to get deeper into Appalachia and see some cool sights along the way and get some good film for you guys so that when we put the video together it would be something worth watching. My advice to all or you out there is simple, get out there and find a place where the pavement ends and the trails begin and make some memories of your own….and don’t forget to watch ours as well….we hope that you learn some things and enjoy watching them and that they inspire you to take hold of life and have your own adventures too!
See more at: Mountain State Overland
On: You Tube
And: Face Book
By: Jamie

a review: the schrade survival hatchet. @schradeknives #scaxe2 #tools #overland #adventure
A Review: The Schrade SCAXE2
Function and Design:
The Schrade Survival Hatchet or SCAXE2, is definitely one of those tools that you will be glad to have on hand. As you would imagine from a company like Schrade this is a solid hatchet, it comes in a variety of colors and sizes as well. That way you and your buddies can each get one and you won’t have to worry about getting them mixed up. There is a solid black version, one with an orange handle and one has a green grip. There is also a larger version the Survival Axe or SCAXE2L, it has a nylon sheath and is slightly bigger for larger jobs. I have the SCAXE2G, the “G” indicates that it has the green grip, what I really like about this is that the handle is phosphorescent so it glows in the dark. This is helpful when you’re looking for it after dark because you can’t seem to remember exactly where you laid it down, haha, not that I have ever done that.
I like the design of this hatchet as well, its slightly curved handle and head offer great cutting power for its size. It feels very ergonomic in my hand when using it and I have not felt any hot spots yet either. The grip is rubberized and it doesn’t feel like it will come sliding out of your hand when you’re chopping away on wood for the fire. It also comes with a plastic sheath for the hatchets' head that protects the blade and has a belt loop and grommets on it for carrying it on your waist or lashing to a pack. It is compact as well and can be easily carried in a pack or in your vehicle.
Overland Applications:
We use the survival hatchet and axe on a regular basis, you will usually find one of them laying around just waiting for its next task. It has proven to be a great tool for fire starting at the camp site while out on our overland adventures. It has a built in ferro rod that is about 4 inches long which is a good size because it throws a lot of sparks, it tucks neatly into the handle of the hatchet for quick access and you will always know where it is when you need it. The head is stainless steel so you don’t have to worry if it gets wet it will resist rusting quite nicely. It also has a hammer pommel on one end so that you can drive tent or awning stakes into hard ground, or work on your drawer slide should it need a tap or 2 to keep the latch working properly. It is great for chopping up kindling and even slightly larger chunks for the fire. If you ever run into us on the road ask to see one and I bet that we pull out several for you to check out.
Day to Day Applications:
The day to day applications are also abundant as well. I have taken this hatchet hiking on the trails with me as I like to go out and look for my own fat wood for fire starting. It does a good job dissecting the wood as it can be quite dense at times! I have used it a good bit to start fires, I will admit I have had slightly more success using the blade to get the ferro rod to spark than on the spine where the fire emblem is. Although that could just be due to some of the coating not being scraped off well…I plan to test this further. The Survival Hatchet also pretty much lives in my 2008 Toyota Tacoma when I am not out on an overland trip. I think it is a handy tool to keep with you, just in case, because you never know what can happen or when you may need it!
Final Thoughts:
This is one bad ass hatchet, I continue to be impressed by its usefulness and feel that it will last me for years to come. We have several that we take out on the trail and all of them get use on a regular basis. If you’re looking for a reliable tool for your trips I highly recommend the Schrade Survival Hatchet or Axe they won’t disappoint.
Thanks again Schrade for hooking us up with these awesome products, and for being one of our team sponsors for the 2015 season! Look for more reviews to come, and if you're interested in the Survival Hatchet or any other Schrade product check out the links throughout this blog post. The SCAXE2 runs around $57 dollars on the website.
Cheers
For more info you can visit Taylor Brands LLC.
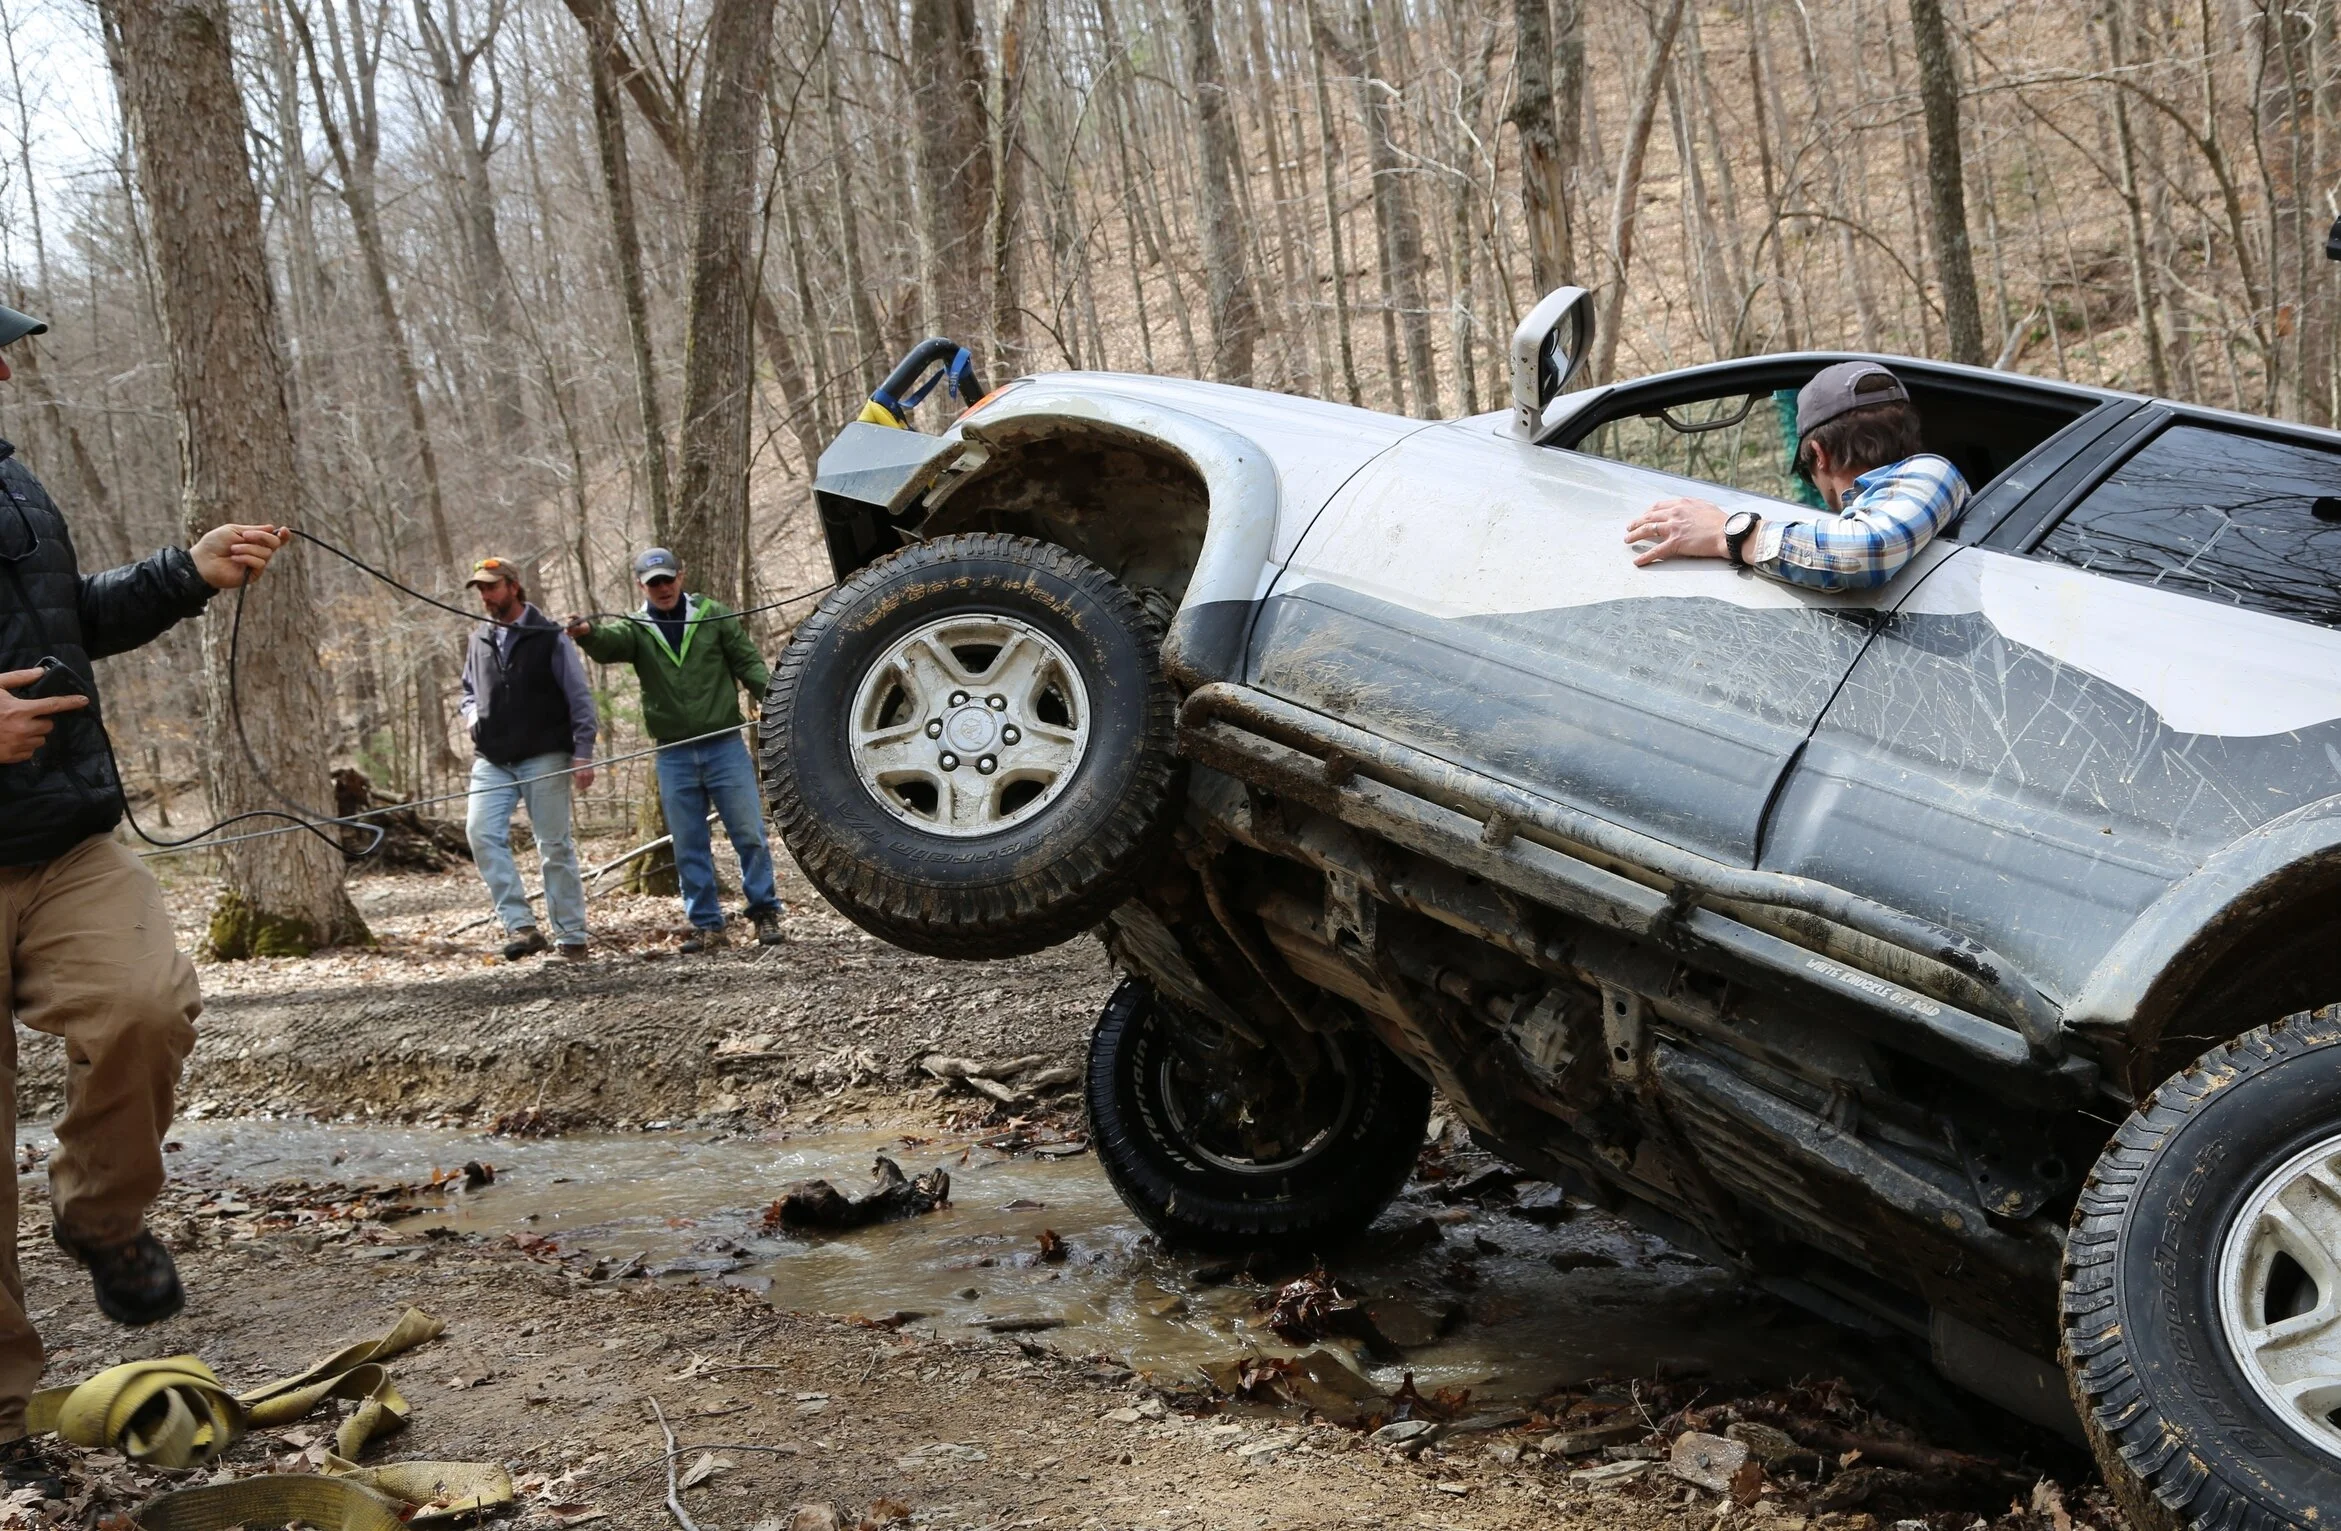
a review: white knuckle off-road rock sliders. #whiteknuckleoffroadproducts #rocksliders #trailarmor #overland
White Knuckle Off-Road Rock Sliders
Like any fine product your initial impression is what really sells you on it. Whether it’s a fine wrist watch or a quality hand tool, when you pick up that item and feel it you know you have something of quality. When John from White Knuckle sent a set of rock sliders for the 3rd gen 4Runner it was evident we had something of very high quality. After getting these things unpackaged we were drawn to their impeccable build quality and the sheer beauty of something that is designed to be absolutely abused. We couldn’t wait to get them on the 4Runner!
Rocker panel protection may be one of those mods some may think isn’t all that necessary, and it depends on a person’s needs as to whether they are a true need. We knew that this was a vulnerable area that needed some attention and White Knuckle became a top choice for us. John sent us the DOM tube model (strongest) with a very nice black powder coat finish and a rear kickout (which has become an absolute savior). These sliders are heavy (55lbs each), strong, and are obviously built to take whatever you can throw at them on the trail. Not only do they protect the vehicle incredibly well they also offer you the ability to jack the vehicle up with a high lift jack in case of a flat on the trail, and there is zero doubt they will hold up to that use.
The sliders came with a package of self-tapping screws that required drilling holes in the frame in order to mount them. We contemplated various methods for mounting them and since we already had the welder fired up for some bumper work we opted to clean the frame up and weld these bad boys on, which turned out to be a very solid mount. The mounting plates on the sliders matched up perfectly with the frame and body of the 4Runner. Obviously built with attention to detail and precise measurements by John and his team.
How do these things perform on the trail? Well, in short...incredibly well! The rear kick out on the sliders have become our best friend. We have drug these things over rocks, roots, stumps, mud, and so on. In one instance the 4Runner was stood up on its end in a bad cutout in the trail and most of the weight of the vehicle was pushed onto the right side kickout which essentially saved a large portion of the passenger side of the vehicle. We were sold at that point and our confidence in using the kickout as a tool to navigate terrain continued to grow. Dropping the vehicle on its side in large (off camber) rutted sections of trail and riding the slider the whole way is possible. Navigating tight sections of trail and using the slider to kick off of stumps or rocks is also possible with no worry of harm to the slider, and most importantly, the vehicle. We also use the sliders regularly to stand on in order to remove items from the roof and to open the roof top tent.
We have put these sliders through their paces since they were installed and have been nothing but pleased. I can usually find something in a product that I’m not particularly fond of or that doesn’t meet my needs but I can honestly say this product is pretty much perfect. It does its job and it does it well and shows zero sign of failure. What more can you ask for in a product built for abuse? If someone were to ask me if I would recommend this product I would answer them with a resounding YES! Not only is their product of the highest quality, John is a top notch guy and customer service is obviously high on his list. Trust me on this one!
More info at White Knuckle Off-Road Products.
The cost of the 3rd Gen. 4Runner sliders from White Knuckle is $560 for the strongest version with a powder coat finish, it is truly an unbeatable value! If you want more info click the link above or give us a shout through the email on the website. Thanks guys, and happy trails!!
Written by: Jeremy
Also check out our "Test Run" video, it shows the White Knuckle sliders in action.